Are you ready to add a playful twist to your wardrobe? Bleach dyeing your shirt or old clothes can transform a plain tee into a unique fashion statement that reflects your personality. As the trend of bleached dye clothing continues to rise, it’s the perfect time to dive into this fun and creative DIY project.
In this blog post, you’ll discover the step-by-step process of bleaching dye a shirt, turning it into a one-of-a-kind masterpiece. From preparing the materials to achieving the desired pattern, this adventure promises to add an exciting touch to your clothing collection.
Get ready to unleash your creativity and express your individuality through the art of bleach dyeing. Whether you’re a seasoned DIY enthusiast or a curious beginner, this comprehensive guide will equip you with the knowledge and inspiration to elevate your style game. So, grab your plain shirt, and let’s embark on this bleach tie dyeing journey together!
Materials You’ll Need
Before you start the bleach dyeing process, it’s important to gather all the necessary materials. Here’s a list of what you’ll need:
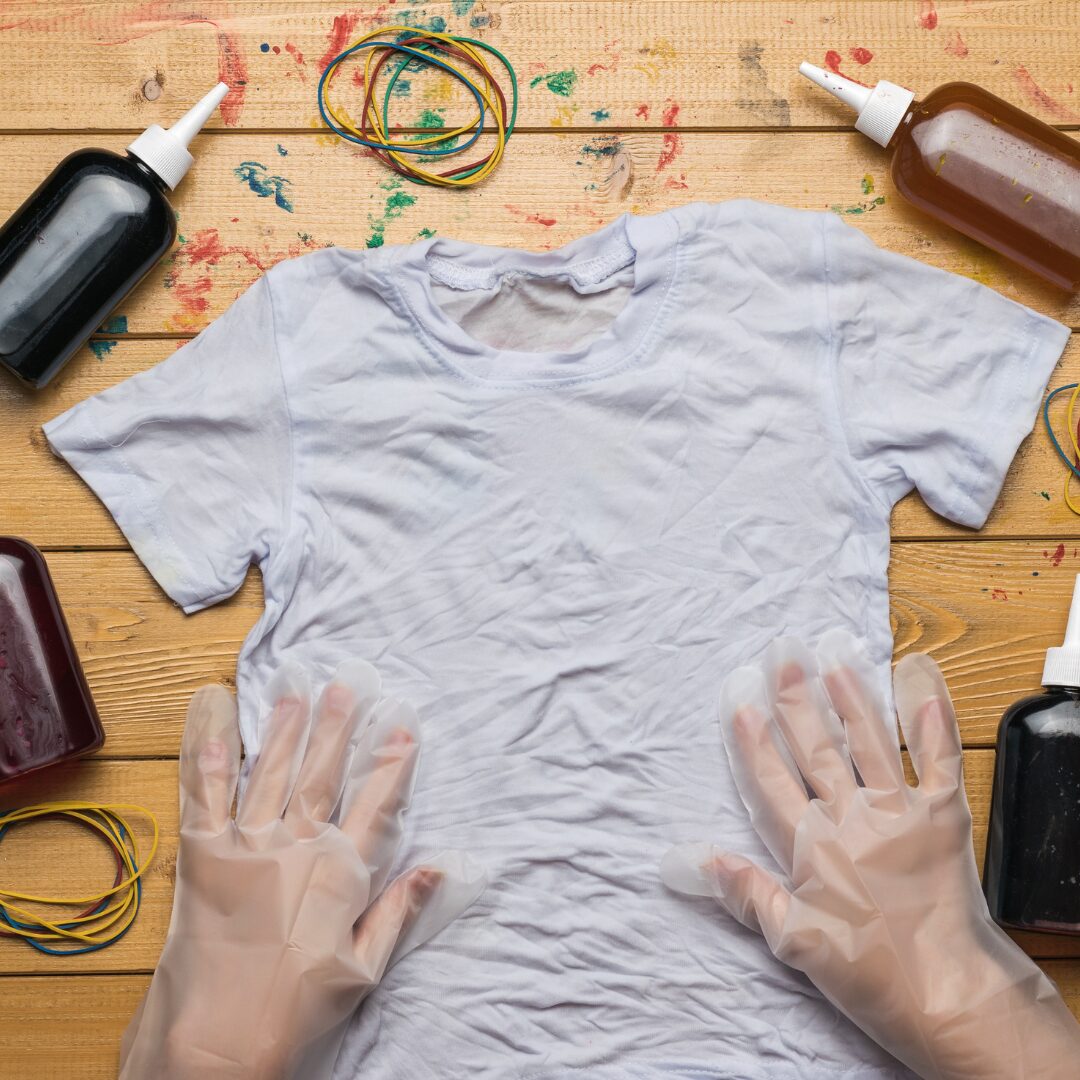
1. Plain Cotton Shirt
Choose a 100% cotton t-shirt for the best results. The natural fibers of the cotton will absorb the bleach evenly, creating a beautiful and unique pattern.
2. Bleach
Opt for a standard household bleach solution, which will effectively lighten the color of the shirt. Ensure proper ventilation when handling bleach and use it in a well-ventilated area.
3. Wear Gloves
Protect your hands with rubber or latex gloves to prevent direct contact with the bleach, which can be harsh on the skin.
4. Plastic Sheet
Lay down a plastic bag, sheet, or tarp to protect your work surface from bleach spills and splatters. This will also make cleanup much easier.
5. Squeeze Bottle or Squirt Bottle
Use a spray or squeeze bottle to apply the bleach onto the shirt. This allows for better control and precision in creating the tie dye pattern.
6. Rubber Bands
These will be used to create tie-dye patterns such as crumples, sunburst pattern, or a spiral pattern. The rubber bands help secure the fabric in place to create different patterns.
7. Protective Eyewear
Safety first! Protect your eyes with goggles or safety glasses, especially when working with bleach to prevent any accidental splashes.
Gathering these materials before you begin the bleaching process will ensure a smooth and enjoyable tie-dye experience. Now that you’ve got everything ready, it’s time to move on to the next steps!
Preparing the Workspace
Alright, so you’ve decided to embark on the exciting journey of bleach tie-dyeing a shirt. But before you dive into the creative process, it’s crucial to set up a workspace that is safe and conducive to your project. Here’s how you can prepare your workspace for the bleach dyeing adventure.
Find a Well-Ventilated Area
First things first, find a well ventilated area for your project. Bleach fumes can be strong, so it’s essential to work in a space with plenty of fresh air. Whether it’s outdoors or a well-ventilated room, ensuring good air circulation will help keep you comfortable and safe throughout the process.
Protect Your Workspace
Cover your workspace with a plastic sheet or old newspapers to create a protective barrier. This will not only prevent accidental spills and bleach splatters but also make the cleaning process a whole lot easier. Remember, bleach can be quite the mischief maker, so it’s best to contain it within a designated area.
Choose Your Workspace Wisely
When selecting your workspace, consider a spot with easy access to cool water. In case of any accidental spills or splatters, having a water source nearby will allow you to quickly address any mishaps. Additionally, opt for a flat and stable surface to work on, ensuring that your dyeing adventure stays on course without any wobbles or spills.
Getting the workspace ready is like setting the stage for your creativity to unfold. Once you’ve prepped your workspace, you’ll be all set to dive into the mesmerizing world of bleach dyeing. So, grab your materials and let’s get ready to transform that plain shirt into a masterpiece!
Preparing the Shirt
So, you’ve got your wild vision for a bleached shirt and you’re ready to get started. But before we dive into the exciting part, let’s get the canvas prepped for your masterpiece.
Step 1: Gather Your Materials
First things first, you’ll need a 100% cotton shirt, bleach, water, a spray bottle, gloves, and some old towels to protect your work area. Make sure you’re working in a well-ventilated space or even outdoors, as bleach fumes aren’t the most pleasant to inhale.
Step 2: Wash and Dry the Shirt
Pop that shirt in the wash and give it a good clean with some detergent. This is a crucial step as it removes any dirt, oils, and sizing from the fabric. Once it’s squeaky clean, toss it into the dryer until it’s fully dry. A clean and dry shirt ensures that the bleach adheres properly, giving you the best results.
Now that you’ve got your shirt prepped and ready, the fun part of the bleaching process is just around the corner!
Creating the Design
So, you’ve got your shirt ready to transform into a work of art, and now it’s time to get creative with the design. Here’s how to apply the bleach and monitor the process to achieve your desired look.
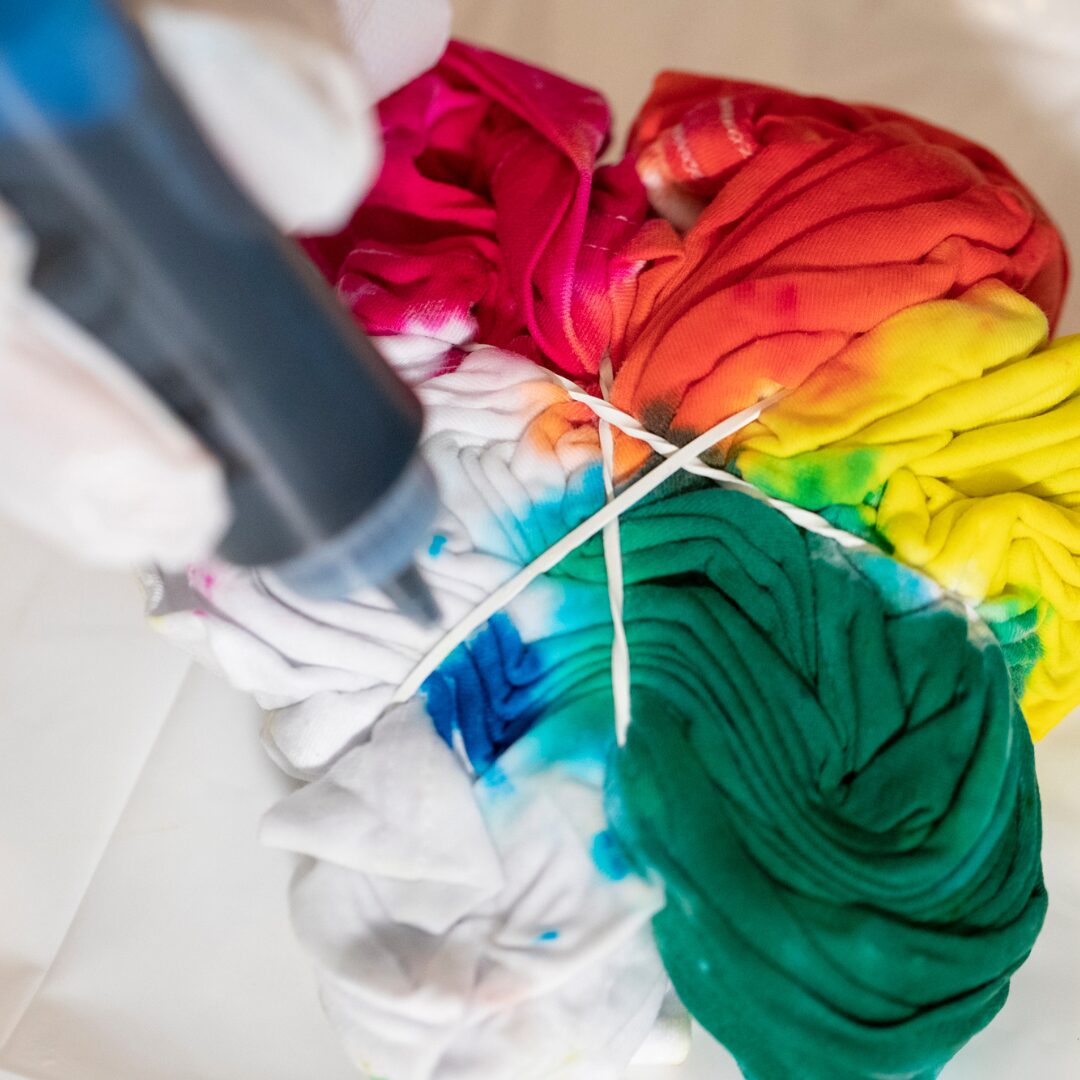
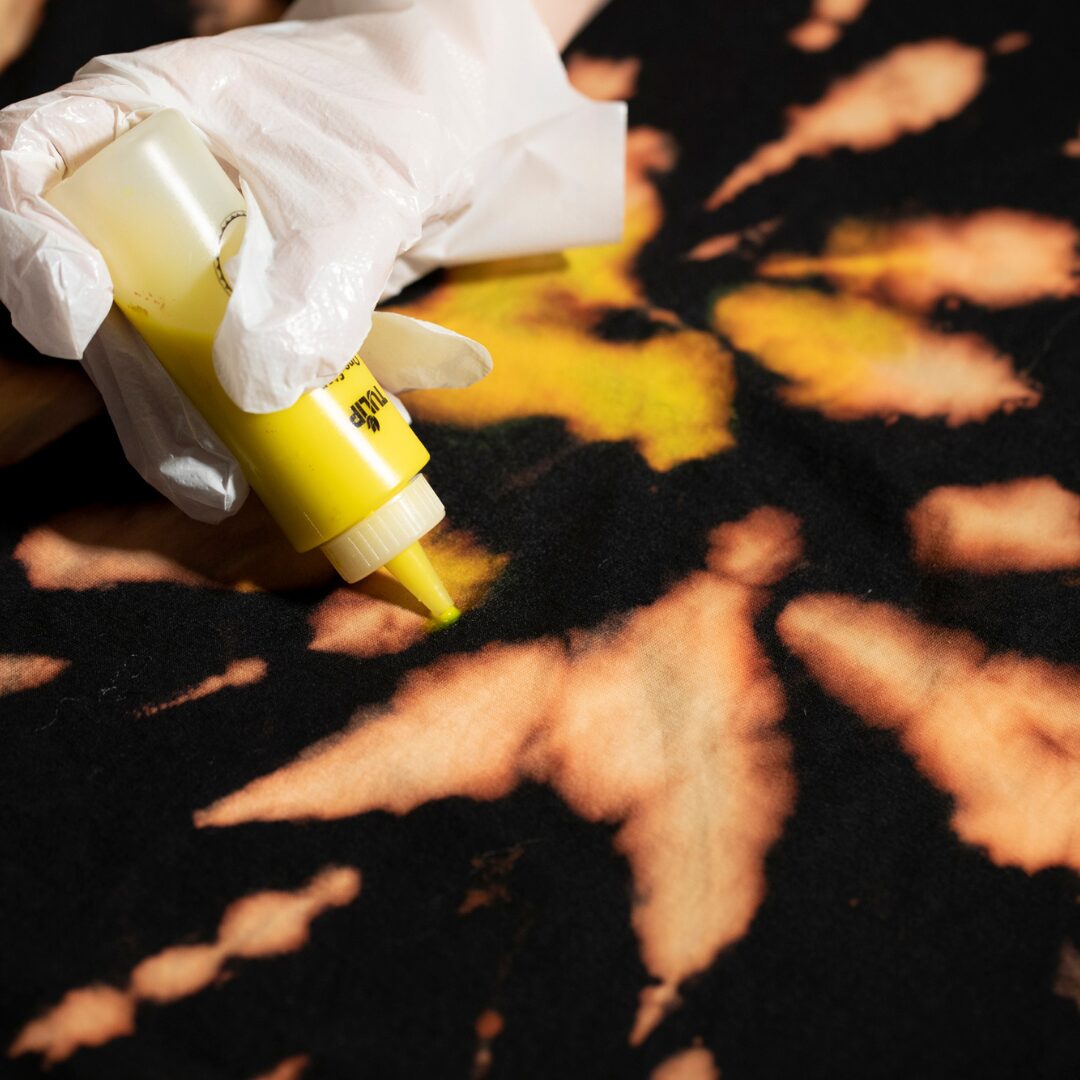
Applying the Bleach
First things first – safety always comes first! Dilute the bleach with water in a spray bottle, ensuring proper ventilation, and don’t forget to wear protective gloves and eyewear. Now, spray the diluted bleach mixture onto your shirt, keeping in mind that the more bleach you apply, the more dramatic the effect. Whether you’re aiming for a subtle, tie-dye effect or a bold, abstract pattern, or a spiral design, the application of bleach is where your unique design takes shape.
Waiting and Monitoring
Patience is key at this stage. It’s time to let the bleach work its magic. Depending on the look you’re aiming for, you’ll need to wait anywhere from 5 to 20 minutes before checking the color change for light-colored fabrics, and 30 to 40 minutes for dark-colored shirts. If you’re going for a light, delicate design, a shorter waiting time may suffice. Alternatively, if you’re after a more intense and dramatic effect, a longer waiting period might be in order. Throughout this time, be sure to monitor the bleaching process closely to ensure you achieve the precise design you’re envisioning. Remember, every shirt is different, and the results can vary, so keeping an eye on the shirt’s transformation is crucial to achieving the desired effect.
Now, get ready to unleash your creativity and experiment with different techniques like crumpling, folding, or using rubber bands to create a myriad of personalized designs. Whether you’re aiming for a sunburst effect or a mesmerizing swirl, the possibilities are endless, and it’s all about embracing the unexpected and reveling in the spontaneous artistry.
Rinsing and Washing
So, you’ve successfully achieved the desired bleaching effect on your shirt, and now it’s time to rinse and wash it to perfection. This crucial step will ensure the bleach is completely removed and prevent any damage to the fabric. Let’s dive into the rinsing and washing process with some quirky tips to achieve a fantastic outcome!
Rinsing with Cold Water
First things first, when it comes to rinsing your bleached shirt, always use cold water. The cold temperature helps to halt the bleaching process, preventing the color change from progressing any further. Imagine it as a quick freeze for those rebellious bleach molecules that are up to no good. This simple yet effective step can save your shirt from over-bleaching and ensure the desired look is locked in.
Thorough Washing
Once you’ve given your shirt a refreshing cold water rinse, it’s time to dive into a thorough washing session. Use a high-quality mild detergent to gently cleanse the shirt, ensuring all the bleach is completely removed. Think of it as a soothing spa day for your shirt – a little TLC to wash away all the harsh bleach and leave it feeling fresh and renewed.
Tips for Washing and Drying
When it comes to washing, it’s best to opt for a gentle cycle to prevent any unnecessary wear and tear on the piece of clothing. After washing, air-dry your shirt to maintain its integrity. Remember, just like you enjoy soaking up some sun to rejuvenate, your shirt needs some air and sunshine to dry naturally and maintain its newfound bleach artistry.
Aftercare and Maintenance
So, you’ve successfully bleached dyed your shirt and created a unique, eye-catching design. Now it’s time to ensure that your creation lasts for a long time. Proper aftercare and maintenance are crucial for preserving the vibrancy of the design and the overall quality of your shirt. Below are some tips to help you maintain your bleached shirt:
Washing Instructions
When it comes to washing your bleached shirt, always turn it inside out before putting it in the washing machine. This simple step can protect the design from rubbing against other garments, preventing premature fading. Use cold water and a gentle detergent to protect both the design and the fabric.
Drying Methods
Avoid using a dryer to dry your bleached shirt, as the heat can cause the design to fade quickly. Instead, opt for air-drying by laying the shirt flat on a clean surface. This method helps to maintain the integrity of the design and the fabric.
Common Mistakes to Avoid
Be cautious when using bleach or any harsh chemicals around your bleached shirt. Accidental spills or splatters can ruin the design. Additionally, avoid using strong stain removers directly on the design, as they can cause discoloration.
Preserving Vibrancy
To keep the colors vibrant and the design looking fresh, consider washing your bleached shirt separately from other clothes. This prevents the design from being affected by friction with other garments or colors bleeding onto it.

Storage Tips
When storing your tie-dye shirts, ensure they are completely dry to prevent any potential mold or mildew growth. Folding tie dye shirts rather than hanging them can also help maintain the shape and integrity of the design.
By following these step-by-step instructions for aftercare and maintenance tips, you can ensure that your bleached shirt remains a statement piece in your wardrobe for a long time. Remember, with a little TLC, your unique designs will continue to turn heads and spark conversations.
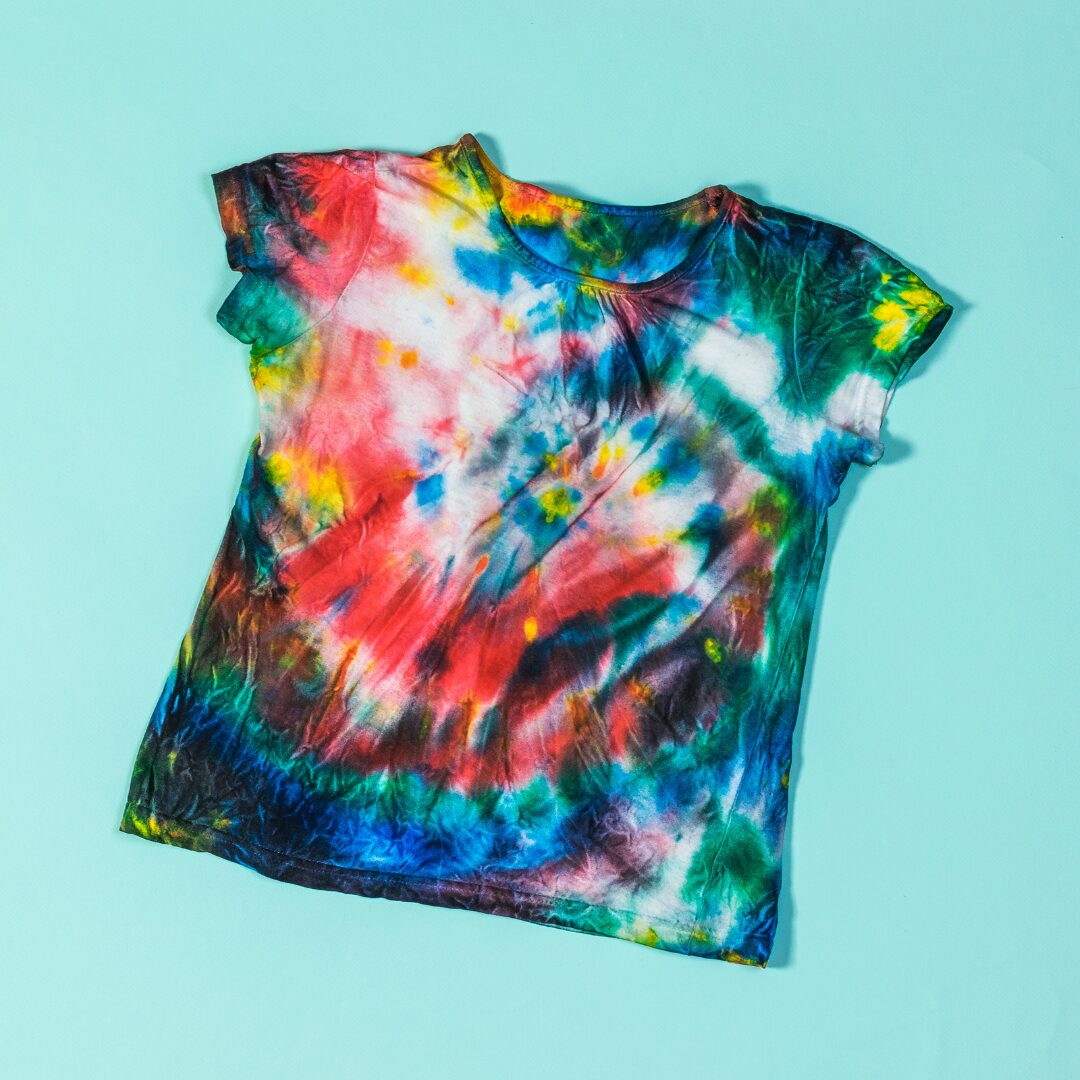
Conclusion
Get ready to unleash your inner artist and transform your plain old shirts into unique, eye-catching masterpieces! Bleach dyeing is not just a DIY project, it’s a fun and creative adventure that allows you to experiment with different designs and patterns. From tie-dye swirls to bold geometric shapes, the possibilities are endless. So grab your bleach, gather your supplies, and let your imagination run wild. Get ready to rock your one-of-a-kind bleached shirt with pride and style!
Unlock a world of fashion wonders with our must-have mystery box! Contact our amazing team here now and be prepared to be amazed!
Share this
Popular products
-
 Women's Mystery Shoe Box
$175.00 – $1,000.00
Women's Mystery Shoe Box
$175.00 – $1,000.00
-
 Men's Mystery Shoe Box
$175.00 – $1,000.00
Men's Mystery Shoe Box
$175.00 – $1,000.00
-
 5 Item per month
$74.00 / month
5 Item per month
$74.00 / month
-
 10 Item per month
$125.00 / month
10 Item per month
$125.00 / month